GameCQ Chat Lobby Online Manual: by Captnsmooth
Installation:
The GameCQ Chat Lobby can be downloaded from
the folloing locations:
PaleStar Mirror | Gamers Dream Mirror | Gamesweb Mirror
Save the gamecq.exe file onto your hard disk. After the download is complete, run this file from the folder you saved it in, and follow the following installation instructions:
a.) Press 'NEXT' on
the welcome screen.
b.) When asked choose the directory in which you want to install the lobby.
By clicking on 'NEXT' you accept the current destination folder.
c.) Then select a name for the program folder that will appear in the programs
section of your start menu, there you will find the lobby software later on.
d.) After installing the files it should read 'InstallShield Wizard Complete'.
Press 'FINISH'
*Note - Downloading the Full Darkspace Installation will automatically include the GameCQ Chat Lobby upon installation.
After you have succesfully installed the GameCQ Chat Lobby, the installation program will place a shortcut on your desktop. Double Click this shortcut to start the GameCQ program. You will then be prompted to enter a login name and password:

If you already have a username and password, enter then, and click Login to proceed. If you are a new user, click New Login, which will bring you to the registration screen:
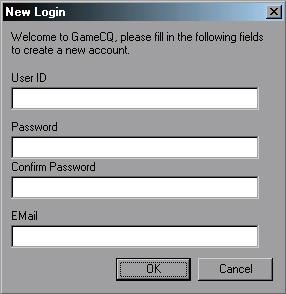
To create a new account, simply enter the neccessary information and a valid email address, and click OK to continue. This will create your username, and log you into the GameCQ Chat Lobby.
The GameCQ Chat
Interface:
Once you have successfully logged in, you will be brought to the GameCQ
Chat Interface:
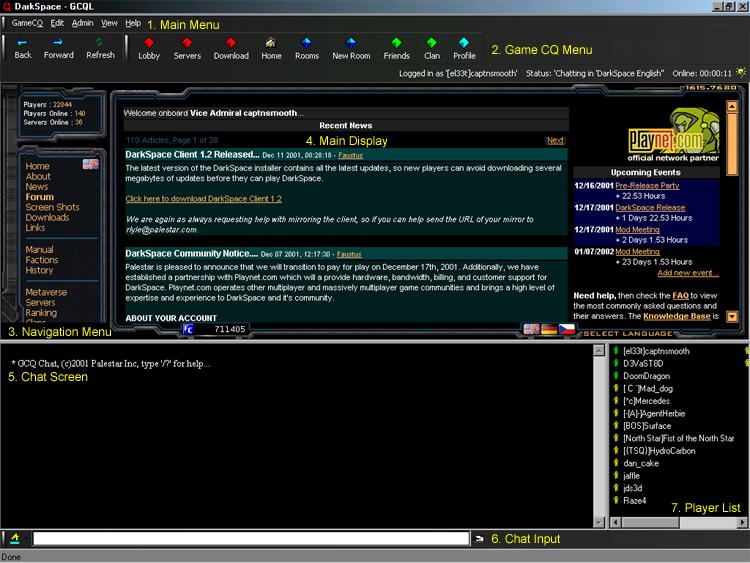
From this image map, you can see the interface is divided up into 7 sections. Here is an explanation of each.
1) Main Menu
![]()
Like any other porgram, the Main Menu of the GameCQ Chat Client controls many functions of the program itself. Here we have 5 menu options.
|
Main
Menu Options
|
||
| GameCQ | 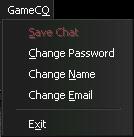 |
GameCQ main options. Save Chat: Currently
Unavailable, this feature will allow you to record a chat log. Exit: Closes the GameCQ Chat Client. |
| Edit | 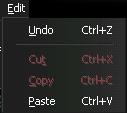 |
Basic edit options. Undo: Undoes the last command. Cut: Cuts the selection
and saves it to the clipboard. |
| Admin |
Administrator / Moderator options. Broadcast: Sends a message to all online players. *Note: This function is only available to moderators and administrators. |
|
| View | 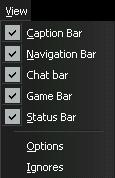 |
Changes the view options for your GameCQ Chat Interface Caption Bar: This
can be found directly below the GameCQ Menu, which displays your name,
your current status, and online time. Options: This will
dispaly an options menu, where you can change you Game Refresh Interval,
Chat Buffer, Chat Sound, Room Announce, Language, and Emotes. |
| Help |  |
Displays help information for the GameCQ Chat Client. About GCQL: Gives
version information about the GameCQ Chat Client. |
As stated before, the EDIT > OPTIONS menu will allow you to change some specifics of you GameCQ Chat Client. It will display the following prompt:
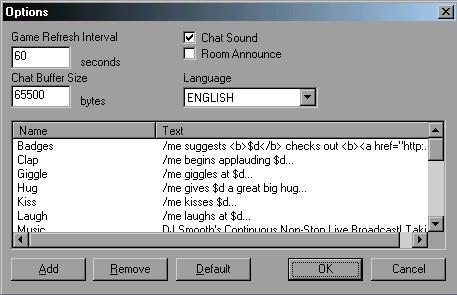
Game Refresh Interval:
This refers to the Servers list, which will be refreshed for whatever
time you enter in this area.
Chat Buffer Size
This allows you to choose how much chat is displayed in the Chat Screen
area. The bigger the buffer, the more chat line will be displayed.
Chat Sound
When a new message appears in the Chat Screen, a sound will be
displayed indicating a new message has been recieved. This option will enable
/ disable chat sound.
Room Announce
When entering a room, you have the option of having the GameCQ Chat Client
automatically announce your arrival, or not. Simply change this option.
Language
When you enter the GameCQ Chat Lobby, you will automatically be placed
into a defaul chat room, usually the Darkspace English room. If you change
your language setting, then you will be place in the Darkspace <language
here> room upon login.
From this screen, you may also edit emotions, or also known as "emotes". To do this, follow the simple instructions:
a.) Click Add.
This will bring up a prompt, asking for the emote name, and input text.
b.) Enter a name you wish to call the emote.
c.) Enter the input text. You will want to start with /me if you want
it to display as an emote. Also, use $d to display the player name you have
selected the emote for.
To edit an existing emote, simply double click on the emote, and change it to what you would like.
To remove an emote, just click Remove and choose the emotes you wish to delete. Clicking on Default will reset your emotes to the original list that came with the GameCQ Chat Client. After you are finished, click OK to save all changes, or Cancel to return without saving your changes.
2) GameCQ Menu
![]()
This menu consists of 2 sections: the Navigation Options (found on the left) and the Game Options (found on the right).
Navigation Options
![]()
The Navigation Options are similar to the ones found on many internet browsers, and will move you back, forward, and refresh pages that you've seen in the Main Display.
Game Options
![]()
The Game Options section consists of several buttons, each with its own function.
|
Game
Options
|
||
| Lobby |  |
Clicking the Lobby button will bring up two options: Darkspace or GameCQ. Selecting "Darkspace" will display the Darkspace homepage in the Main Display. Selecting "GameCQ" will display the Palestar homepage. |
| Servers |
Clicking the Servers button will bring up a list of servers in the Main Display. |
|
| Download |
Clicking the Download button will bring up a list of downloadable files in the Main Display. |
|
| Home |
Clicking the Home button will bring you back to the Darkspace homepage. |
|
| Rooms | 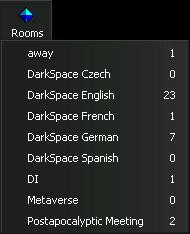 |
Clicking on the Rooms button will display a list of rooms that are available for you to join. This includes all official Darkspace chat rooms, as well as user created rooms. It will also display the number of members currently in a room. |
| New Room |
|
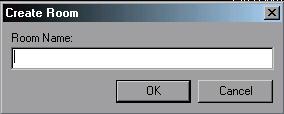
Clicking the New Room button will allow you to create your own room. This will prompt you to select a name for you room, and will automatically place you in that room once you have created it. See the prompt to the left.
|
| Friends | 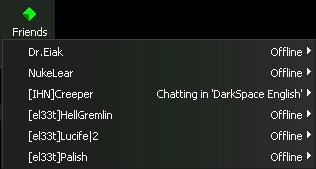 |
Clicking the Friends button will bring up a list of friends that you have added to your friends list. It will display each friend and their current status. If you click on a name, it will give you the option to send that player a message, or delete that player from your friends list. Read the GameCQ Chat Client Commands on how to add friends. |
| Clan | 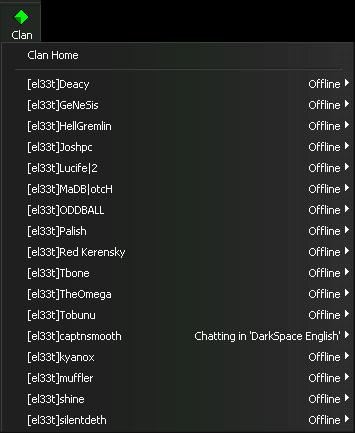 |
Clicking on the Clan button will display a list, depending on your status as a clan member. Clan Members: That is, you are currently in a clan. The Clan button will then display a list of all your clan members, as well as their current status. Here, the only option is to send them a message. Selecting the Clan Home option will bring you to your clan page on Darkspace, displayed in the Main View. Non Clan Members: That is, you are not currently in a clan. The Clan button will then display only the Clan Home selection, which will bring you to the Darkspace list of clans, sorted by faction. |
| Profile | Clicking the Profile button will display your current profile in the Main View. | |
3) Navigation Menu
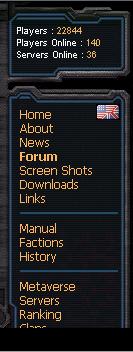
Once you enter the GameCQ Chat Client, the Darkspace homepage will take up most of the mid part of the interface. The homepage can be easily navigated through by using the Navigation Menu to the left. Clicking on these links will display pages in the Main View, to the right.
4) Main View

This is where most of the navigation will be displayed when you are browsing through the Darkspace homepage as well as viewing the Server List, the Download Page, and the Profile Page. Above is the default display you should get, the Darkspace homepage.
Changing Language
![]()
You can also change the language that you view the Darkspace homepage in. Simply click a flag at the "Select Language" area, and you will be brought to that languages homepage. Currently, there are German and Czech mirrors.
Server List
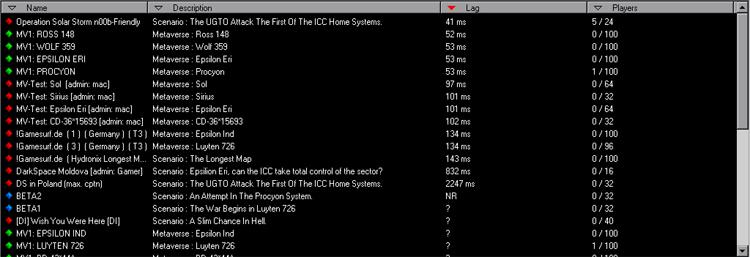
The Server List will display all the servers that are currently running on Darkspace. They are sorted by Name, Description, Lag, and Number of Players. To sort by any one of these catagories, simply click the tab you wish to sort by.
Check out n00bpsace - Servers for more information on server listings.
Download Page

The Download Page will give you many options. From here, you can download the Darkspace Client, screenshots, sounds / music, and other goodies. You can also upload files, such as screenshots and map editor files. However, all files must be approved by the Palestar team before they will be added to the Download Page.
Profile Page

The Profile Page will
display all of your statistics, as well as badges you have earned throughout
the way.
Check out n00bspace
for more information on prestige, ranks, and badges.
How Do I read the
Profile Page?
The Profile Page is quite easy to read. To the right, you will see all
your statistics, organized by certain catagories. We'll get into that in a
minute. The main part of the Profile Page is take up by a display of badges
(if you have any). Badges are acquired when you have reached a certain number
of points in certain catagories. Combined with rank, these will give you access
to bigger and better ships.
Back the the statistics. They are divided up into several catagories. The first catagories, displayed in black, are your basic information. It will display your registration date, your ID number (used by administrators and moderators), user information, prestige, and rank. The catagories displayed in red are your game statistics. This ranges from time played, to repair points, to planet collisions. For a more detailed look at these catagories, check out n00bspace - prestige guide.
5) Chat Screen
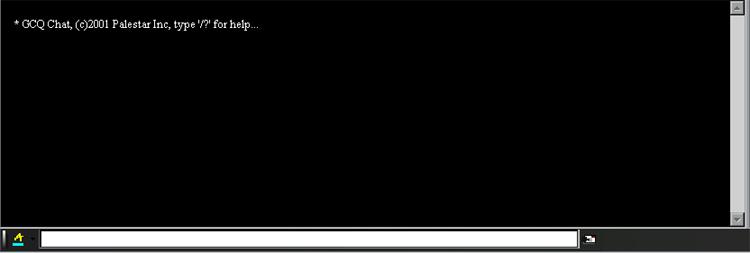
This is the area where all the chat will be displayed. When a new message is displayed, it will dispay a timestamp (in GMT standard time), the players name, and their text. Emotions will also be displayed, however only with a asterisk (*) before the emote, and no time stamp. There is also a list of GameCQ Chat Client commands, which perform different functions. Here is the list of the commands:
GCQ Client Commands
/? ... Display chat help
/room ... List/Join/Create/Find Rooms
/status ... Set status
/away ... Set status to away
/back ... Restore status from away
/find ... Find another user
/who ... Show profile information
/clan ... List/Join/Create/Find clans
/friend ... List/Add/Remove friends
/ignore ... List/Add/Remove ignores
/say ... Send message to players in current room
/whisper ... Whisper message to another player in the room
If you are having trouble with these commands, just type in a command, for instince /friend, and it will prompt you and tell you what else you need to input to correctly use a certain command.
6) Chat Input
This is where you type you text that you wish to send to the lobby. *Note:
HTML coding can be used in the lobby, so you can manipulate you font size,
type, color, etc if you know the proper HTML codes.
![]()
You can also change the color of your text. At the bottom of the screen, you should see a space where you enter your text to chat. To the left, there is a small letter "A" with a color bar under it.
![]()
The color bar indicated the current color of your text. To change it, click next to the "A" to the right. This brings up a color selection. Just pick and choose, and you're done!
5) Player List
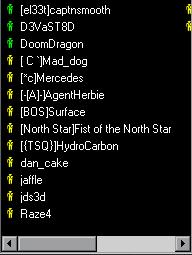
This is the list of players currently in the Darkspace chat room. You will notice all the players have a little "person" next to their names. For normal players, the color of this "person" will be yellow. Moderators will have a green person next to their names, and for Administrators the color will be white.
Moderators
are players who have volunteered to help administrators enforce the rules.
Administrators are the creators of the game Darkspace or the Community
Managers.
Retrn to the Darkspace Homepage
